Amazon (EC2)
This tutorial helps users how the attributes for the resource section in the node definition can be collected from the web interface of the Amazon cloud.
First of all, you need of course an Amazon AWS account. Using Amazon AWS is implemented using the EC2 interface, thus the EC2-Helloworld tutorial is a good starting point.
In case of Amazon EC2, the following information is necessary to start up a node in an Occopus infrastructure:
security credentials (access key and secret key)
Amazon region name and its EC2 endpoint
an image ID (AMI)
an instance type
at least one security group ID
a key pair name
a subnet identifier.
Security credentials (access key and secret key)
You can get your access key and secret key through the web interface of Amazon AWS:
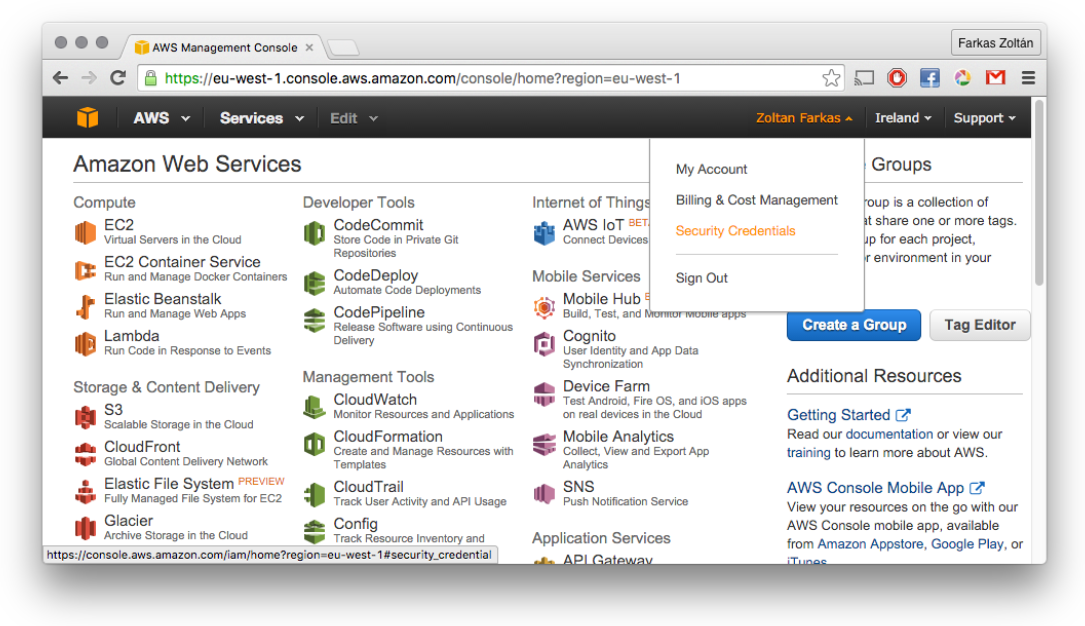
Visit the AWS console.
In the top right corner, select “Security credentials” under your profile as shown in the following screenshot:
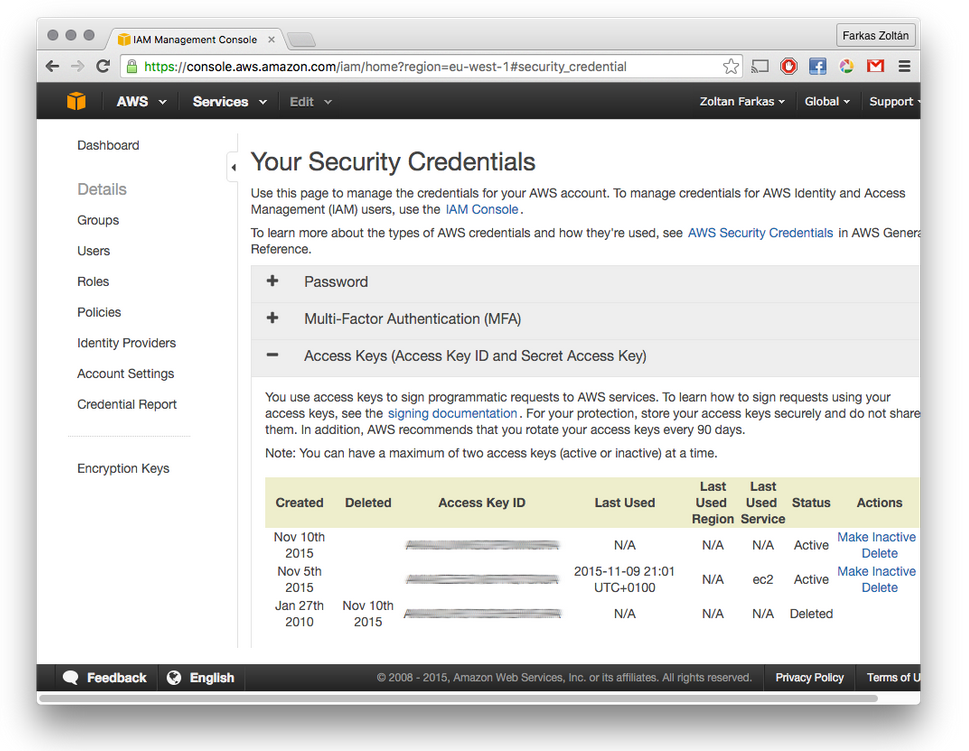
Expand the Access keys menu, as shown in the following screenshot:
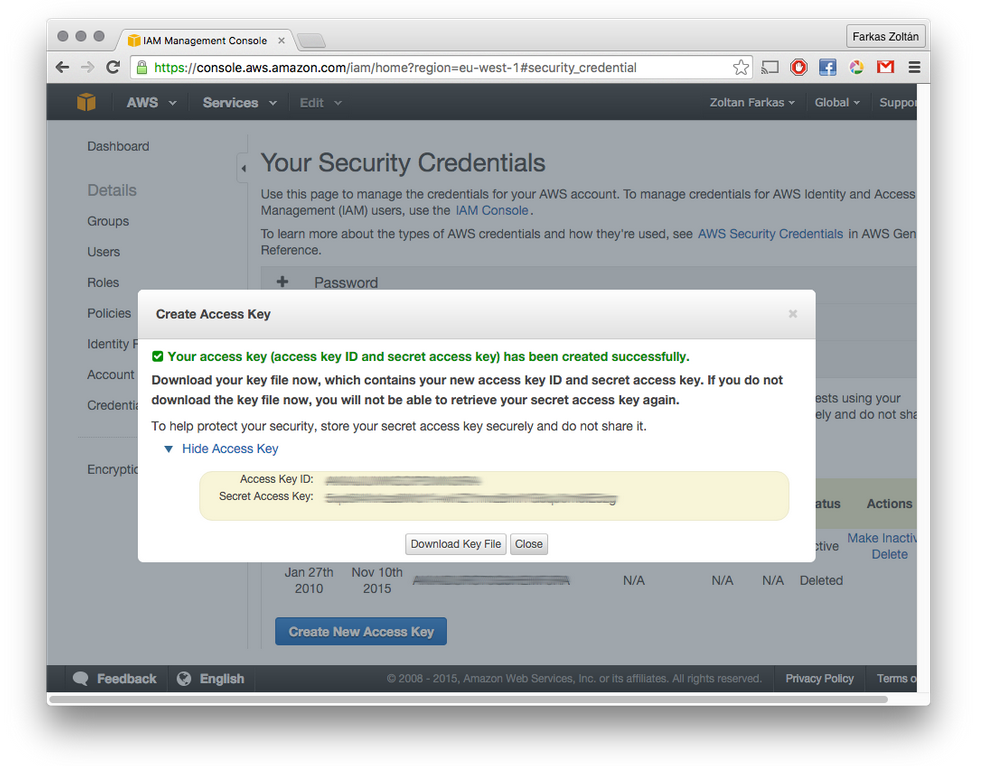
Click on the “Create New Access Key” button to create new credentials if you don’t know the Secret Access Key of your already existing key(s). A window similar to the following screenshot will appear. Here you can make your Access Key ID and Secret Access Key appear, but you can also download your credentials for later use.
Amazon region name and its EC2 endpoint
Amazon hosts its services in multiple regions. There are two possible ways to get region names and their relevant EC2 endpoints: using the EC2 command line tools or the web interface.
Use the web interface to get region names and EC2 endpoints
The Amazon Documentation Amazon Documentation has a list of available regions and their EC2 endpoints. In order to get the complete EC2 endpoint URL for Occopus, simply add https:// before the Endpoint specified by the table shown in the Amazon Documentation’s table.
For example, the EC2 endpoint URL of the eu-west-1 region is https://ec2.eu-west-1.amazonaws.com. Simple as that.
Use the EC2 command line tools to get region names and EC2 endpoints
Follow the EC2 command line tool setup guide to set up and configure EC2 command line tools onto your machine. Once done, you can use the ec2-describe-regions command to list available regions and EC2 endpoints:
$ ec2-describe-regions  -H
REGION      Name            Endpoint
REGION      eu-west-1       ec2.eu-west-1.amazonaws.com
REGION      ap-southeast-1  ec2.ap-southeast-1.amazonaws.com
REGION      ap-southeast-2  ec2.ap-southeast-2.amazonaws.com
REGION      eu-central-1    ec2.eu-central-1.amazonaws.com
REGION      ap-northeast-1  ec2.ap-northeast-1.amazonaws.com
REGION      us-east-1       ec2.us-east-1.amazonaws.com
REGION      sa-east-1       ec2.sa-east-1.amazonaws.com
REGION      us-west-1       ec2.us-west-1.amazonaws.com
REGION      us-west-2       ec2.us-west-2.amazonaws.com
Here, the second column shows the region name, the third column shows the EC2 endpoint for the given region. You should prefix the endpoint name with https:// for receiving the endpoint URL for Occopus.
Get image ID
Two possible methods are available to get a proper image ID: using the EC2 CLI tools’ ec2-describe-images -a command and the web interface. The second one is preferred, as one can get a more user-friendly description of the picked on image.
In the AWS EC2 management console, select AMIs from the IMAGES menu. Search for an AMI, as shown in the screenshot below:
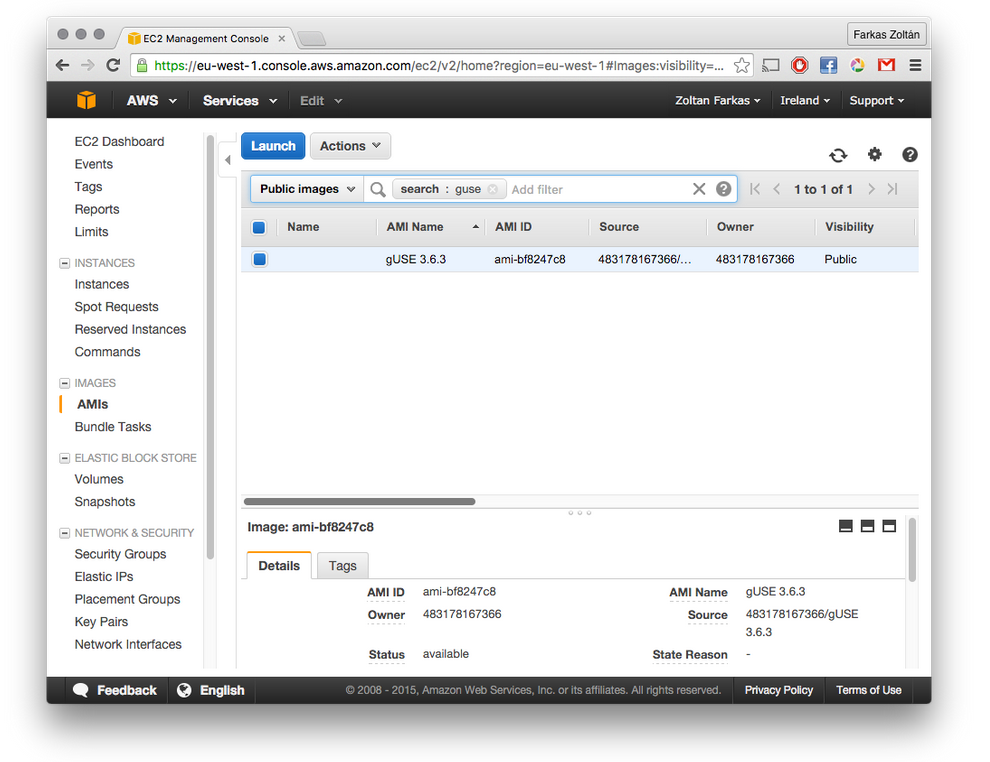
Here, the value of the AMI ID column contains the image identifier.
Get instance type
The instance type determines the characteristics (CPU, memory) of the VM created. You can get the names and properties of the instance types supported by Amazon through the Instance types documentation.
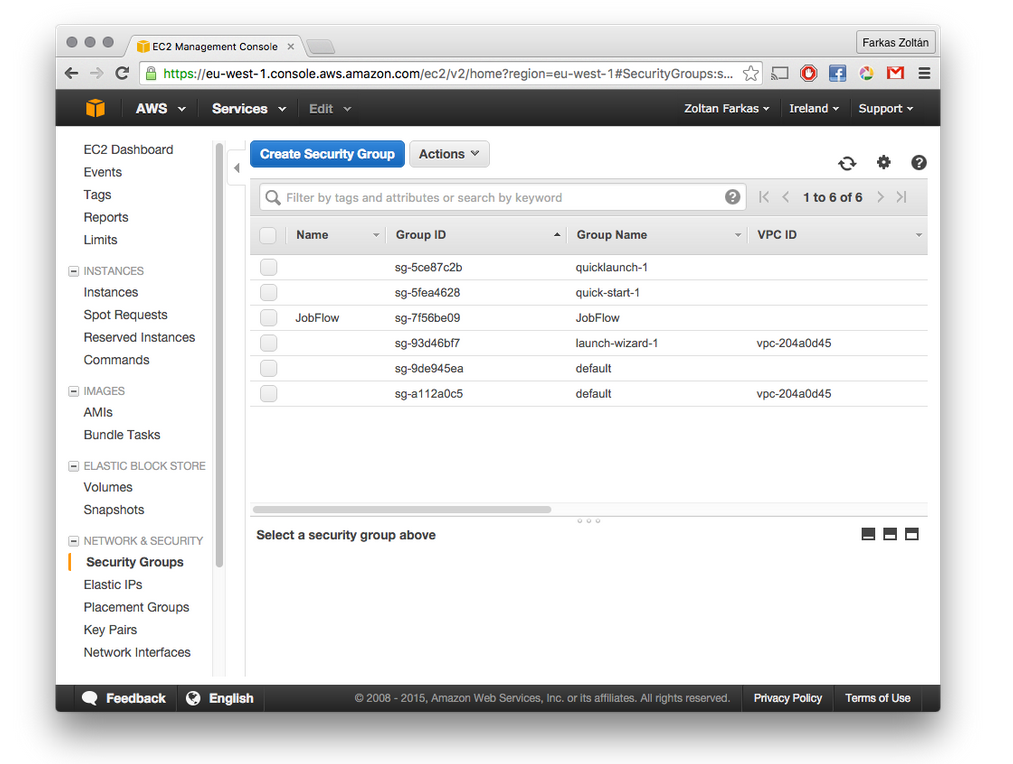
Get security group IDs
Security groups define the network traffic allowed for the instances to be started. Thus, you should create security groups in order to enable SSH or HTTP traffic into your VM. The following screenshot shows a number of security groups already defined. Select those you’d like to attach to the VM started by Occous. The value of the Group ID column contains the values which are needed by Occopus.
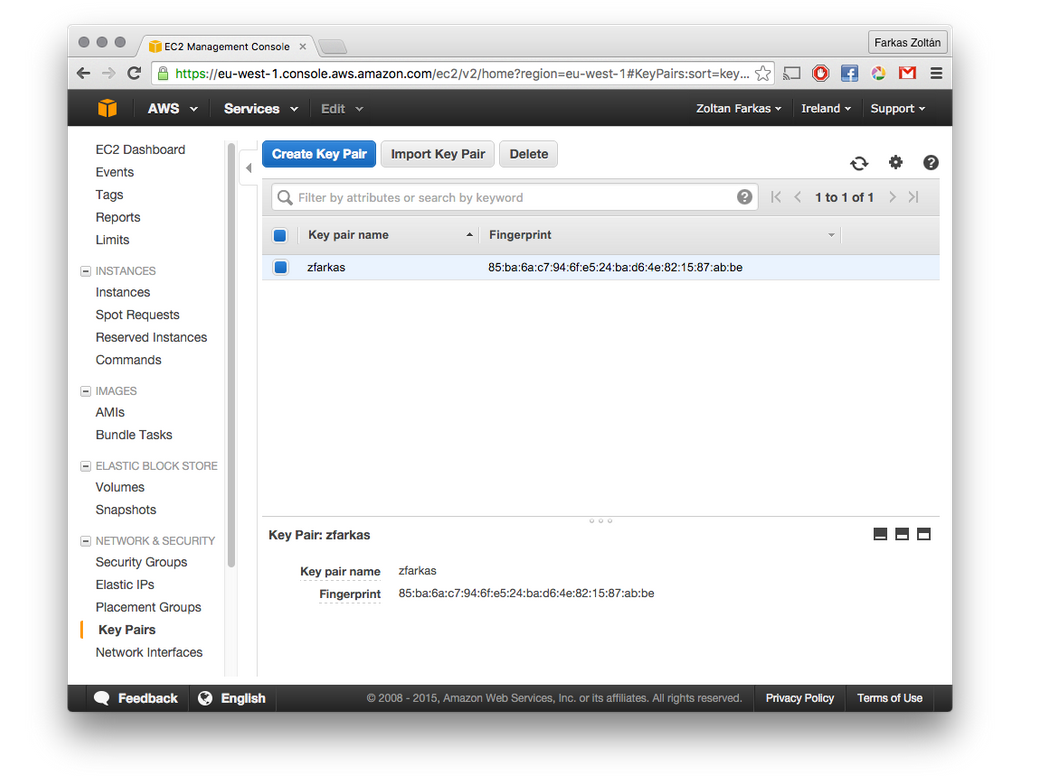
Get keypair name
Key pairs are importd into your running VM so SSH access is possible. You can check the name of available keypairs in the AWS EC2 management console, under the Key Pairs menu as shown in the following screenshot. The value of the Key pair name is the one Occopus needs.
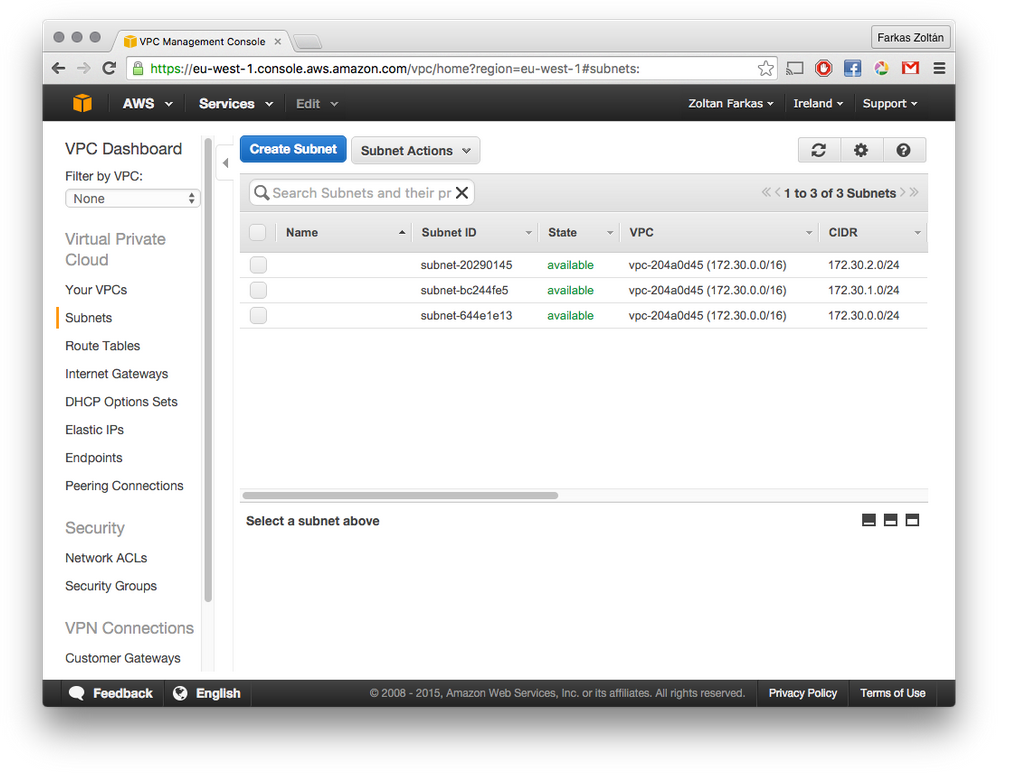
Get Subnet identifier
You can get the list of available subnets through the AWS VPC dashboard, by selecting Subnets from the menu as shown in the following screenshot. You should use the value of the Subnet ID column for Occopus.
Closing
With all the above values, now you can modify the EC2-Helloworld tutorial to run on Amazon.
Cloudbroker
This tutorial helps users how the attribute values under the resource section in node definition for the cloudbroker plugin can be collected from the web interface of CloudBroker.
A minimal version of the resource section for CloudBroker may look like as follows:
resource:
  type: cloudbroker
  endpoint: replace_with_endpoint_of_cloudbroker_interface
  description:
     deployment_id: replace_with_deployment_id
     instance_type_id: replace_with_instance_type_id
     key_pair_id: replace_with_keypair_id
     opened_port: replace_with_list_of_ports_separated_with_comma
contextualisation:
  ...
- You need to collect the following attributes to complete the resource section:
endpointdeployment_idinstance_type_idkey_pair_idopened_port
endpoint
The value of this attribute is the url of the CloudBroker REST API interface, which is usually the same as the login url.
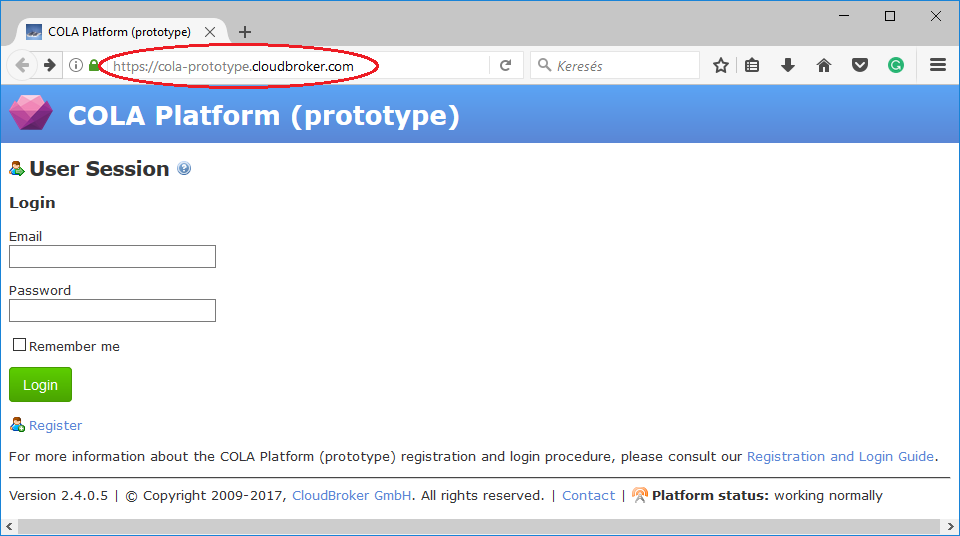
As a result, in our case the endpoint attribute in the resource section will be https://cola-prototype.cloudbroker.com.
deployment_id
The value of this attribute is the id of a preregistered deployment in CloudBroker referring to a cloud, image, region, etc. After login to the CloudBroker Web UI, select Software/Deployments menu.

On this page you can see the list of the preregistered deployments. Make sure the image contains a base os (preferably Ubuntu) installation with cloud-init support! Assuming we need a Linux Ubuntu 14.04 on CloudSigma, click on the name of the deployment. The id is the UUID of the deployment which can be seen in the address bar of your browser.
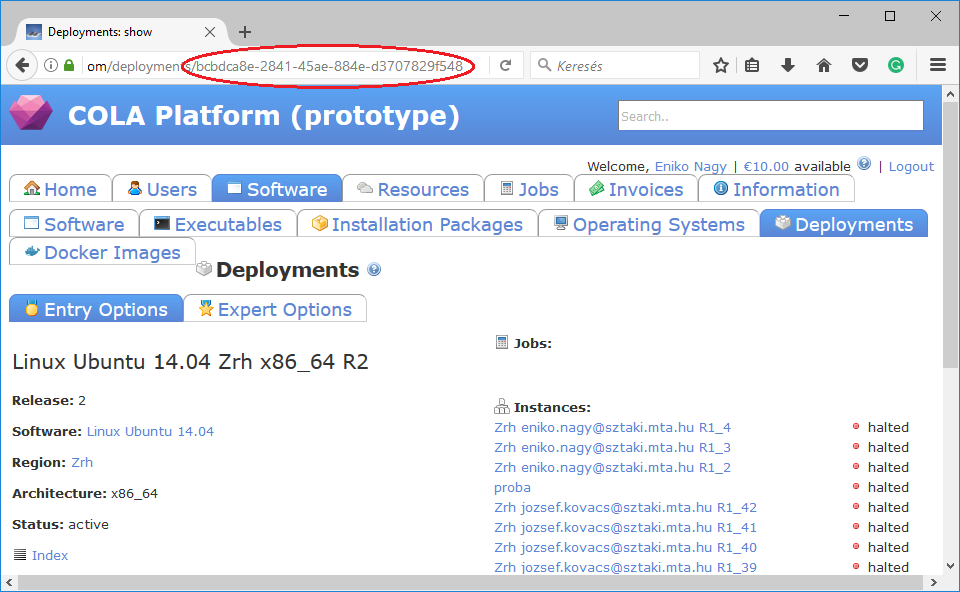
As a result, the deployment_id attribute in the resource section will be bcbdca8e-2841-45ae-884e-d3707829f548.
instance_type_id
The value of this attribute is the id of a preregistered instance type in CloudBroker referring to the capacity of the virtual machine to be deployed. Select Resources/Instance Types menu. On this page you can see the list of available instance types.
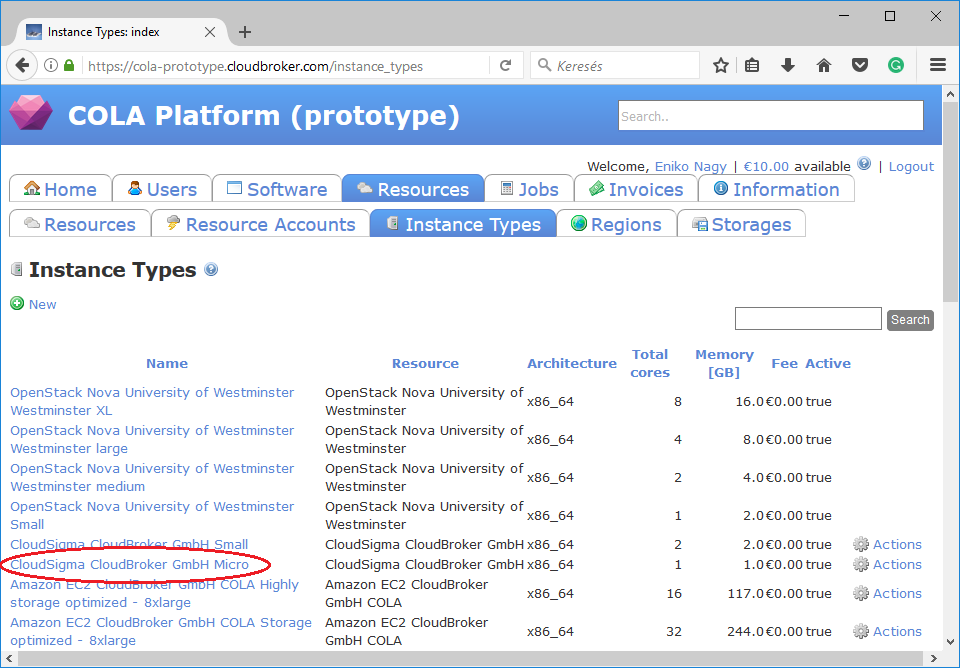
Assuming we need a Micro instance type for CloudSigma, select and click on the instance type. The id is the UUID of the instance type which can be seen in the address bar of your browser when inspecting the details of the instance type.
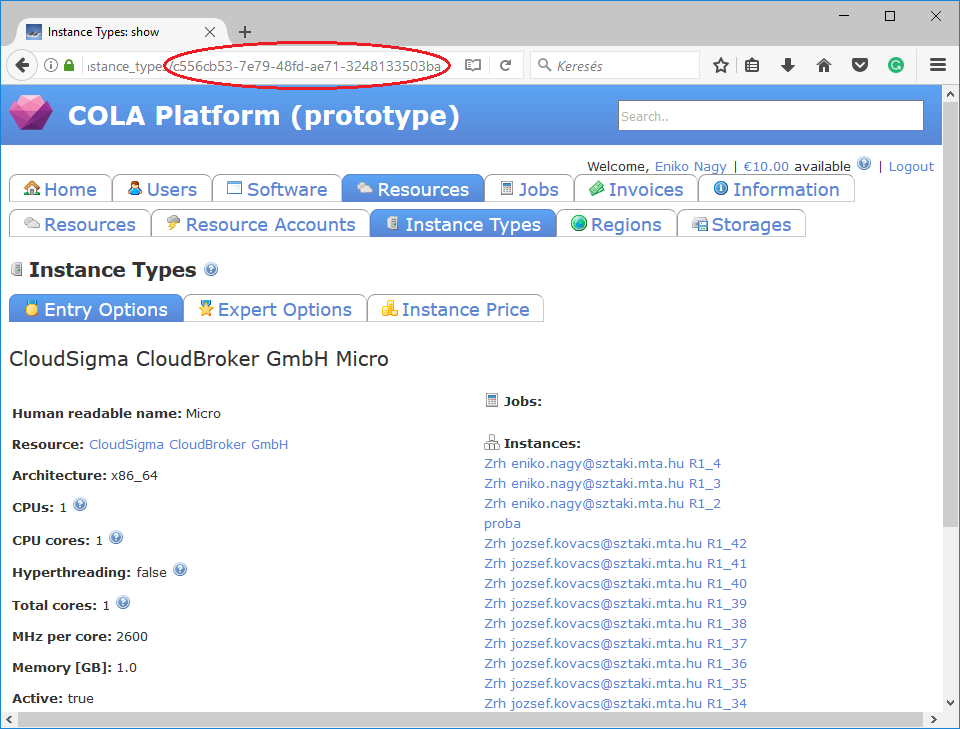
As a result, the instance_type_id attribute in the resource section will be c556cb53-7e79-48fd-ae71-3248133503ba.
key_pair_id:
The value of this attribute is id of a preregistered ssh public key in CloudBroker which will be deployed on the virtual machine. To register a new ssh public key, upload one on page under the Users/Key Pairs menu.
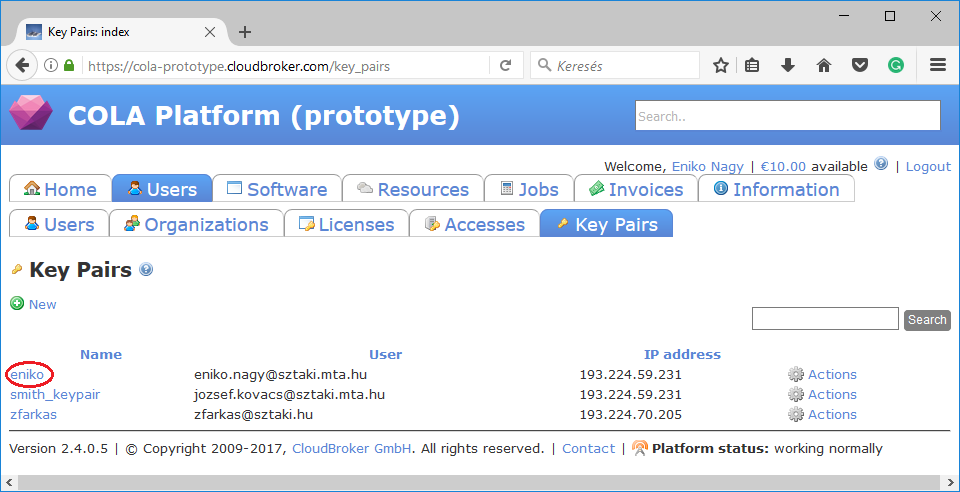
On this page you can see the list of registered keys. Assuming we need the key with name “eniko”, click on the name of the key. The id is the UUID of the key pair which can be seen in the address bar of your browser when inspecting the details of the key pair.
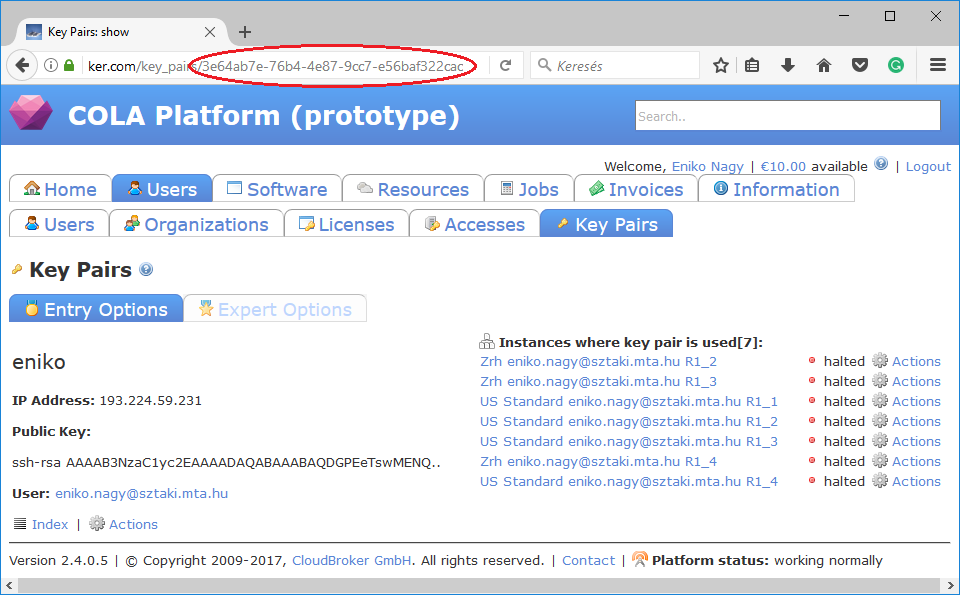
As a result, the key_pair_id attribute in the resource section will be 3e64ab7e-76b4-4e87-9cc7-e56baf322cac.
opened_port:
The opened_port is one or more ports to be opened to the world. This is a string containing numbers separated by comma. Assuming we would like to open ports 80 and 443 for our web server, the opened_port attribute in the resource section will be ‘80, 443’.
The finalised resource section with the IDs collected in the example above will look like this:
resource:
  type: cloudbroker
  endpoint: https://cola-prototype.cloudbroker.com/
  description:
    deployment_id: bcbdca8e-2841-45ae-884e-d3707829f548
    instance_type_id: c556cb53-7e79-48fd-ae71-3248133503ba
    key_pair_id: 3e64ab7e-76b4-4e87-9cc7-e56baf322cac
    opened_port: ‘80, 443’
contextualisation:
  ...
CloudSigma
The following tutorial will help users how the attributes for the resource section in the node definition can be collected from the web interface of the CloudSigma cloud. In the following example we will use the Zurich site of CloudSigma.
A minimal version of the resource section for CloudSigma may look like as follows:
resource:
  type: cloudsigma
  endpoint: https://zrh.cloudsigma.com/api/2.0
  libdrive_id: <uuid_of_selected_drive_from_library>
  description:
    cpu: 2000
    mem: 2147483648
    pubkeys:
      -
        <uuid_of_your_registered_public_key>
    nics:
      -
        firewall_policy: <uuid_of_your_registered_firewall_policy>
        ip_v4_conf:
          conf: dhcp
contextualisation:
  ...
- The example above assumes the followings:
Virtual machine will be started at the Zurich site, see
endpointattribute. To use an alternative location, select one from the cloudsigma documentation on API endpoints.CPU speed will be 2000Mhz. See
cpuattribute.Memory size will be 2GByte. See
memattribute.VM will have a public ip address defined by dhcp. See
ip_v4_confattribute.
- You need to collect the following 3 more attributes to complete the section:
libdrive_idpubkeysfirewall_policy
libdrive_id
The value of this attribute is an uuid refering to a particular drive in the storage library on which an operating system is preinstalled usually. After login to the CloudSigma Web UI, select Storage/Library menu and a full list of available drives will be listed.
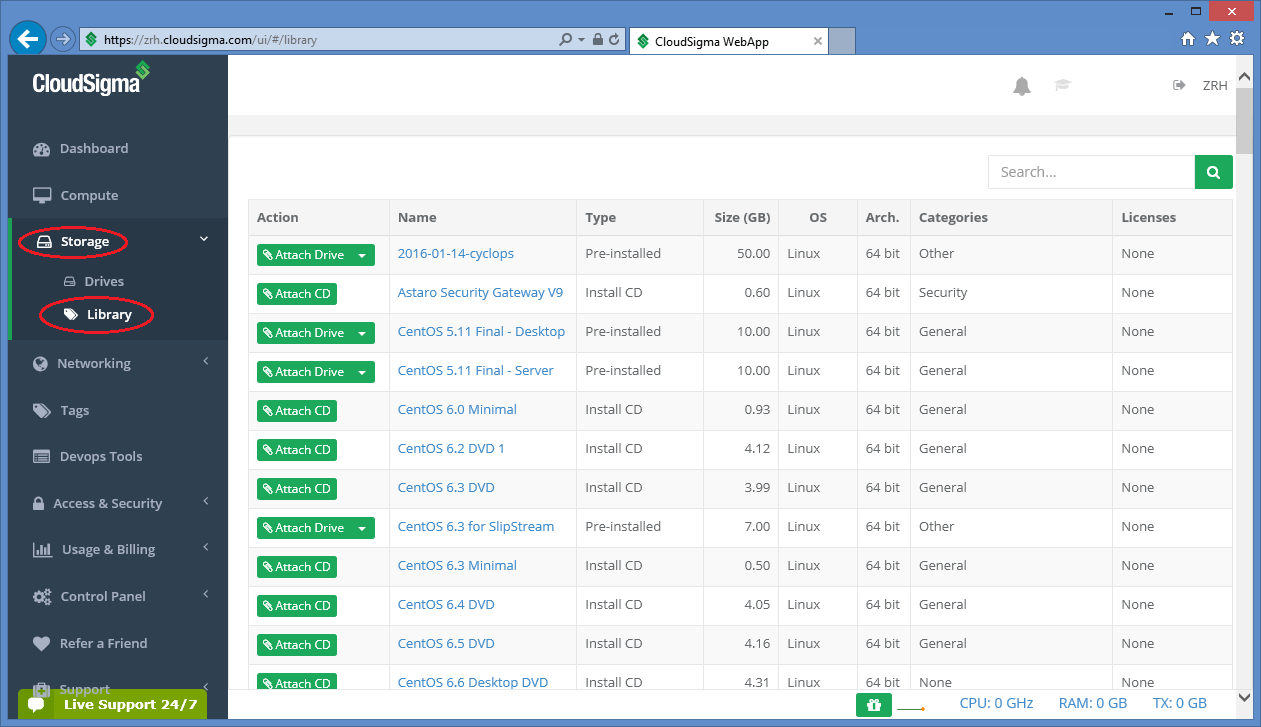
Assuming we need an Ubuntu 14.04 LTS(Trusty), scroll down and search for that drive.
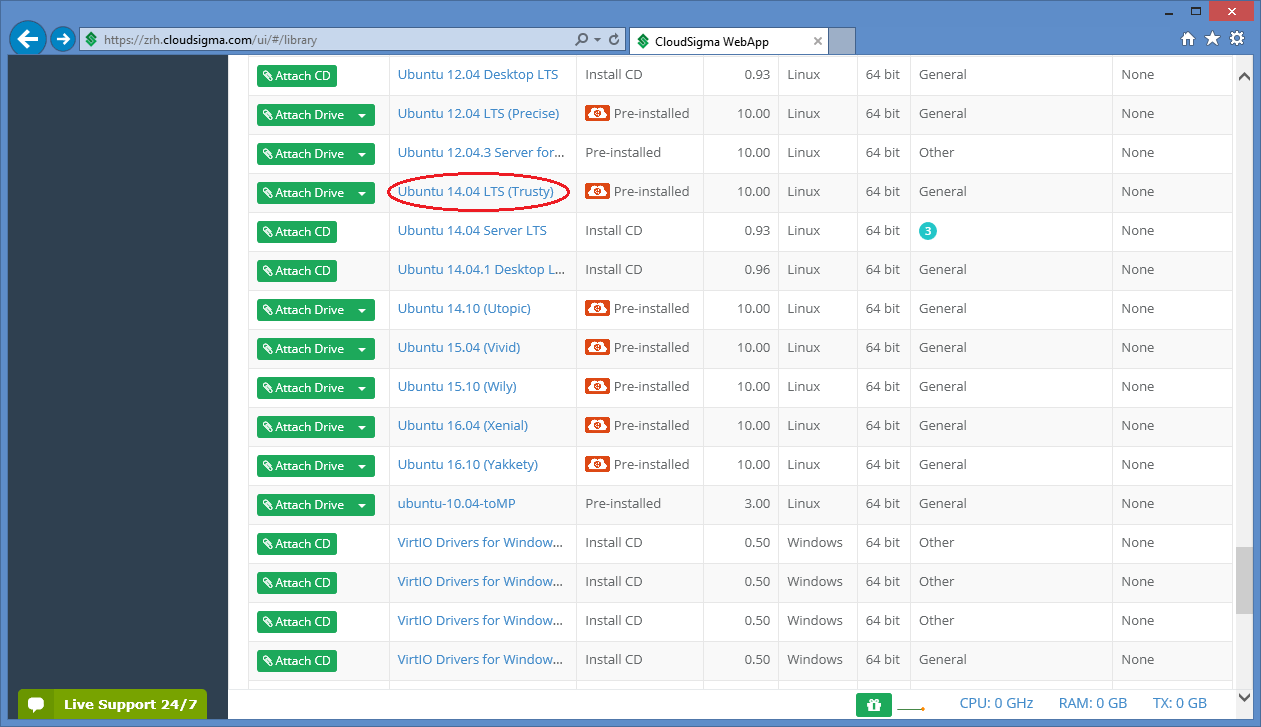
Then click on the item and copy its uuid from the address bar.
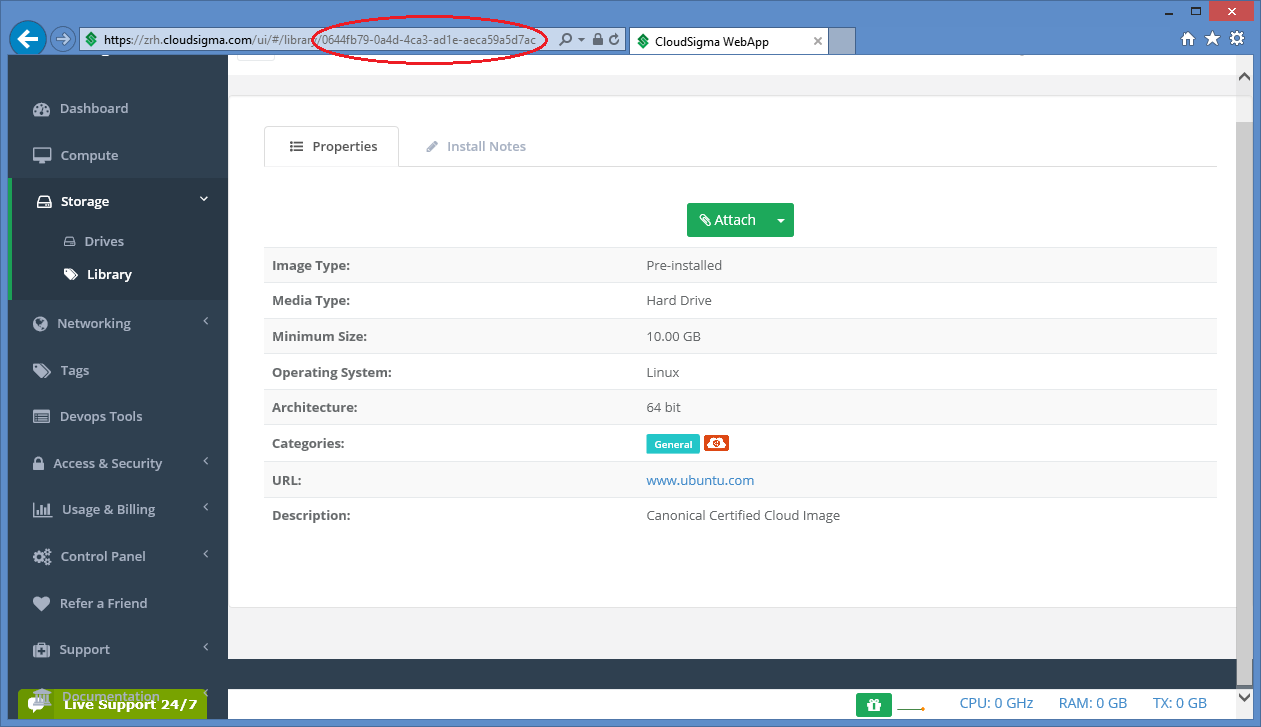
As a result, the libdrive_id attribute in the resource section will be 0644fb79-0a4d-4ca3-ad1e-aeca59a5d7ac referring to the drive containing an Ubuntu 14.04 LTS(Trusty) operating system.
pubkeys
The value of this attribute is the uuid refering to a particular public key registered under your CloudSigma account. To register a new ssh keypair, generated or upload one at page under the Access & Security/Keys Management menu. On this page you can see the list of registered keys and their uuid.
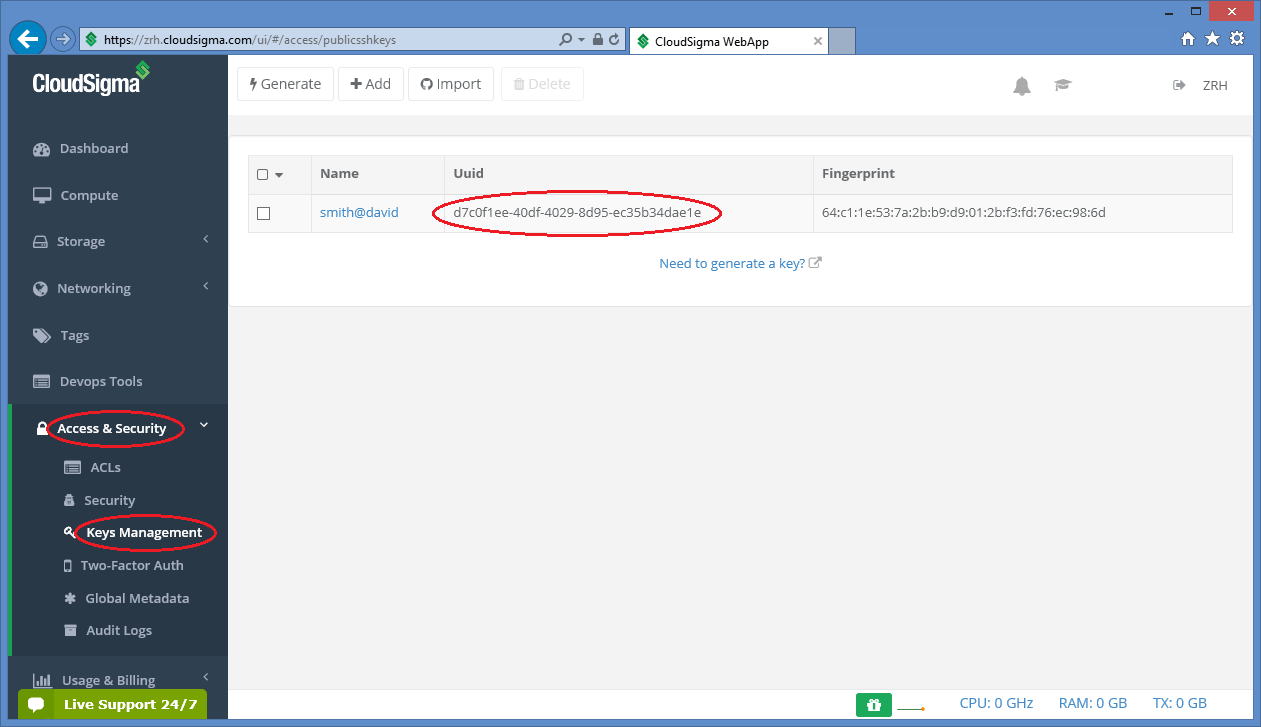
As a result, the pubkeys attribute in the resource section will be d7c0f1ee-40df-4029-8d95-ec35b34dae1e in this case refering to the selected key. Multiple keys can be specified, if necessary.
firewall_policy
The value of this attribute is the uuid refering to a particular firewall policy registered under your CloudSigma account. To register a new firewall policy, use the page under the Networking/Policies menu. On this page you can see the list of registered firewall policies.

Click on the firewall policy to be applied on the VM, the new page will show the uuid of the policy.
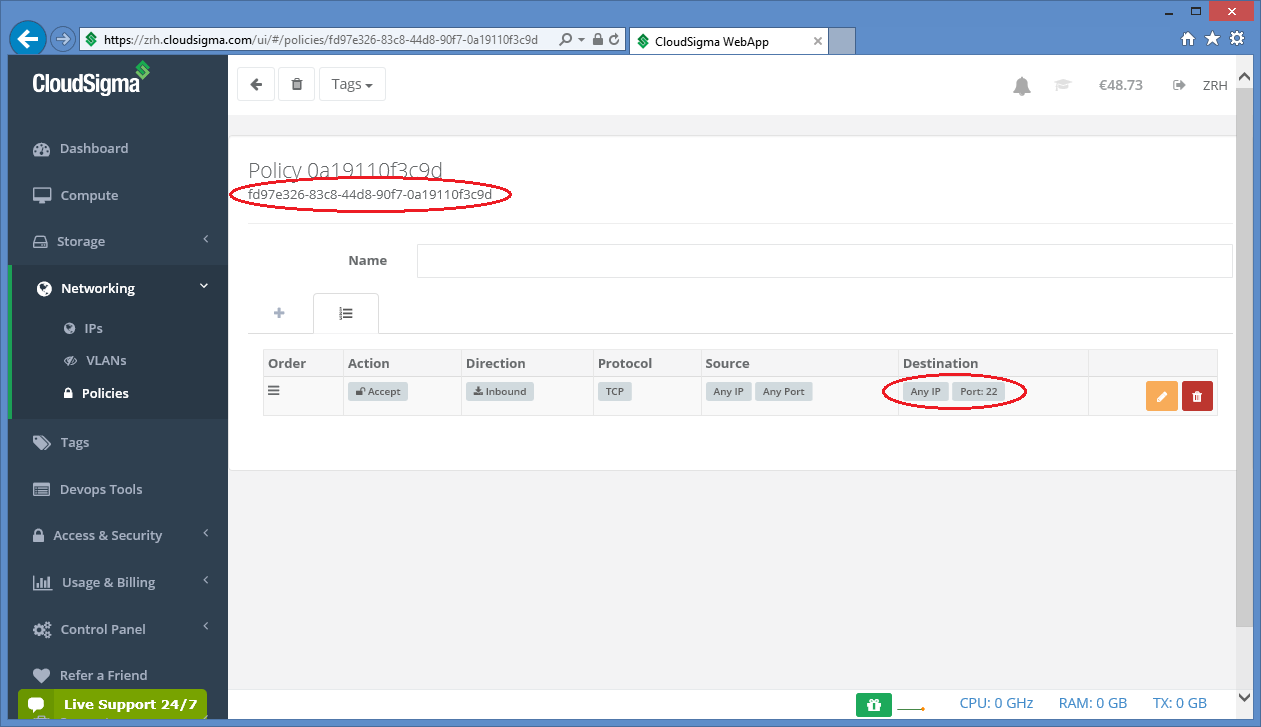
As a result, the firewall_policy attribute in the resource section will be fd97e326-83c8-44d8-90f7-0a19110f3c9d in this case refering to the selected policy. In this policy, port 22 is open for ssh. Multiple policies can be specified, if necessary.
The finalised resource section with the uuids collected in the example above will look like this:
resource:
  type: cloudsigma
  endpoint: https://zrh.cloudsigma.com/api/2.0
  libdrive_id: 0644fb79-0a4d-4ca3-ad1e-aeca59a5d7ac
  description:
    cpu: 2000
    mem: 2147483648
    pubkeys:
      -
        d7c0f1ee-40df-4029-8d95-ec35b34dae1e
    nics:
      -
        firewall_policy: fd97e326-83c8-44d8-90f7-0a19110f3c9d
        ip_v4_conf:
          conf: dhcp
contextualisation:
  ...
Important
Collect the uuids under your account instead of using the ones in this example!
Important
The resource section must follow YAML syntax! Make sure indentation is proper, avoid using <tab>, use spaces!
OpenStack Horizon (Nova)
This tutorial helps users how the attribute values under the resource section in node definition for the nova plugin can be collected from the Horizon web interface of OpenStack. In this help the hungarian MTA Cloud will be taken as an example to show the procedure.
A minimal version of the resource section for MTA Cloud may look like as follows:
resource:
  type: nova
  endpoint: replace_with_endpoint_of_nova_interface_of_your_cloud
  project_id: replace_with_projectid_to_use
  user_domain_name: Default
  image_id: replace_with_id_of_your_image_on_your_target_cloud
  network_id: replace_with_id_of_network_on_your_target_cloud
  flavor_name: replace_with_id_of_the_flavor_on_your_target_cloud
  key_name: replace_with_name_of_keypair_or_remove
  security_groups:
      -
          replace_with_security_group_to_add_or_remove_section
  floating_ip: add_yes_if_you_need_floating_ip_or_remove
  floating_ip_pool: replace_with_name_of_floating_ip_pool_or_remove
contextualisation:
  ...
- You need to collect the following attributes to complete the resource section:
endpointproject_idimage_idnetwork_idflavor_namekey_namesecurity_groups
endpoint
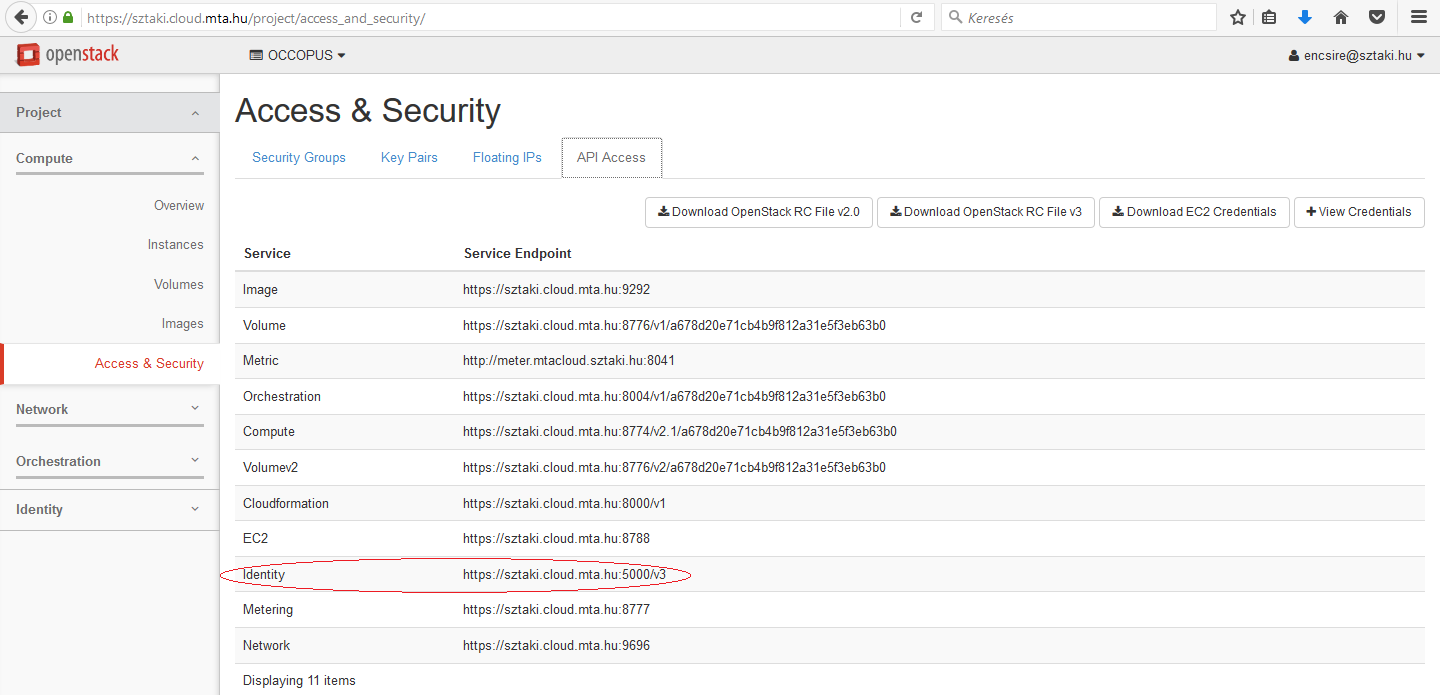
The endpoint is an url of the nova interface of your OpenStack cloud. After login to the Horizon Web UI, select Project/Compute/Access & Security/API Access menu. The value of the endpoint is the service endpoint of the Identity service.
Note
The nova endpoint for MTA Cloud is: https://sztaki.cloud.mta.hu:5000/v3.
project_id
The value of this attribute is an ID referring to a project registered under your account. Select Identity/Projects menu and a full list of available projects will be listed. Select the proper project and copy its ID found at the Project ID column.
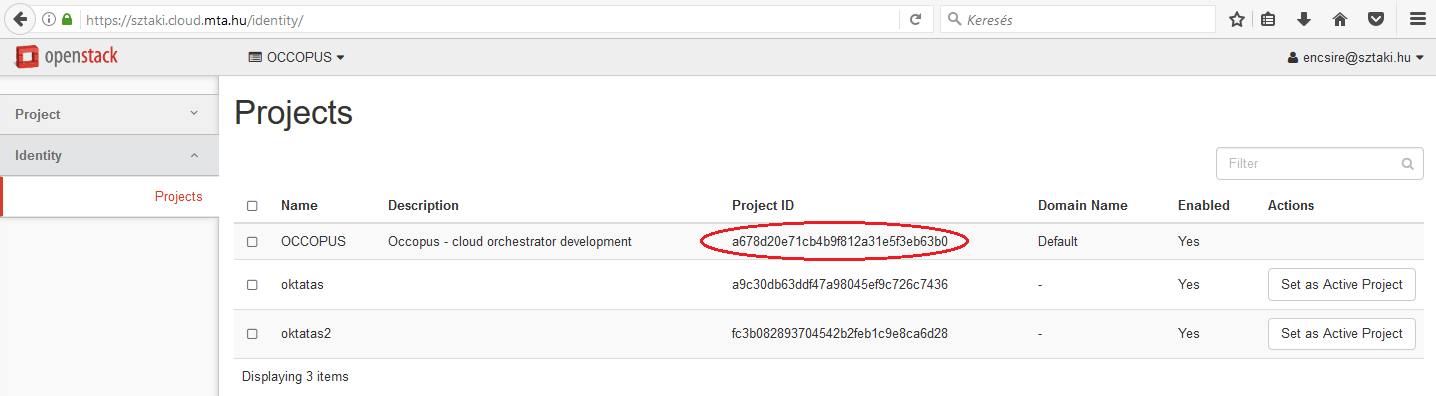
We have chosen the OCCOPUS project for which the project_id attribute in the resource section will be a678d20e71cb4b9f812a31e5f3eb63b0.
image_id
The value of this attribute is an ID referring to an image on the cloud to be instantiated to realize a virtual machine. Select Project/Compute/Images menu and a full list of available images will be listed.

Assuming we need an Ubuntu 14.04 LTS, click on the name of the image. On the appearing page the ID attribute contains the value we are looking for.
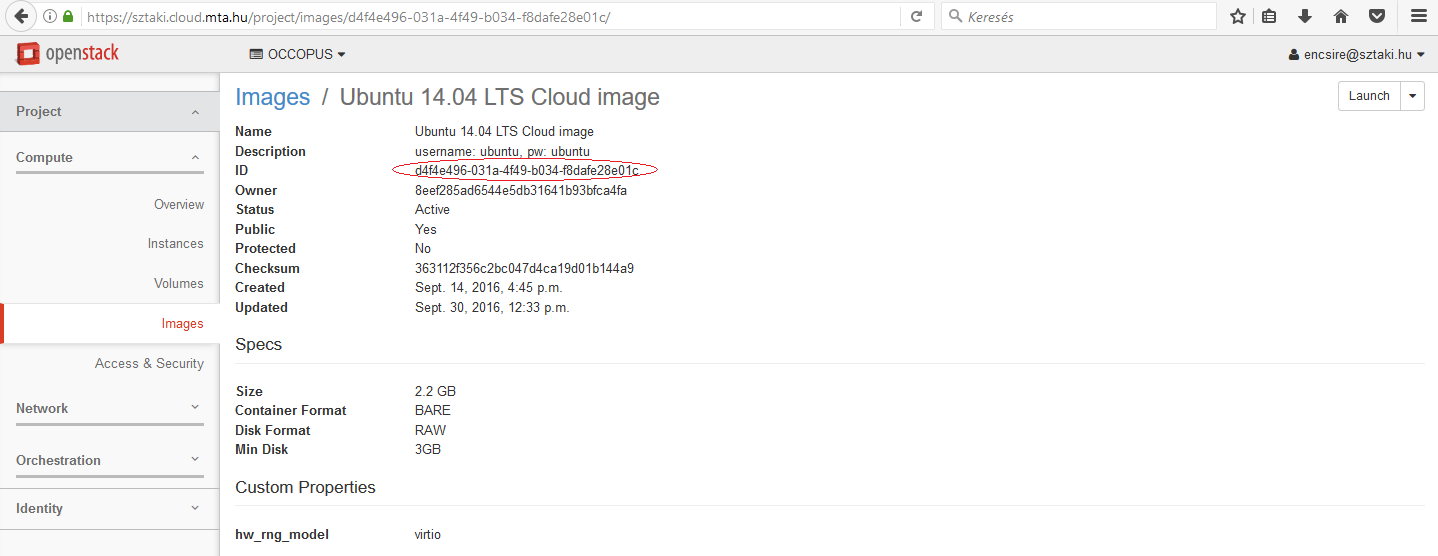
As a result, the image_id attribute in the resource section will be d4f4e496-031a-4f49-b034-f8dafe28e01c.
network_id
The value of this attribute is an ID refering to the ID of the network to attach to the virtual machine. Select Project/Network/Networks. On this page you can see the list of available networks of your project.
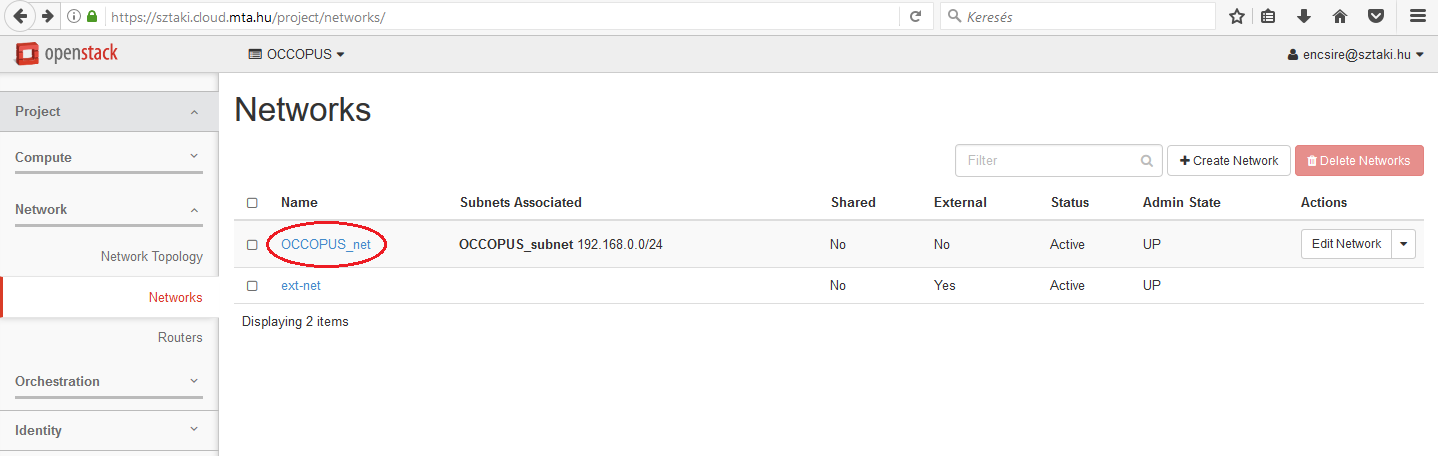
Assuming we need the OCCOPUS_net network, select and click on the network. On the appearing page the ID attribute contains the value we are looking for.
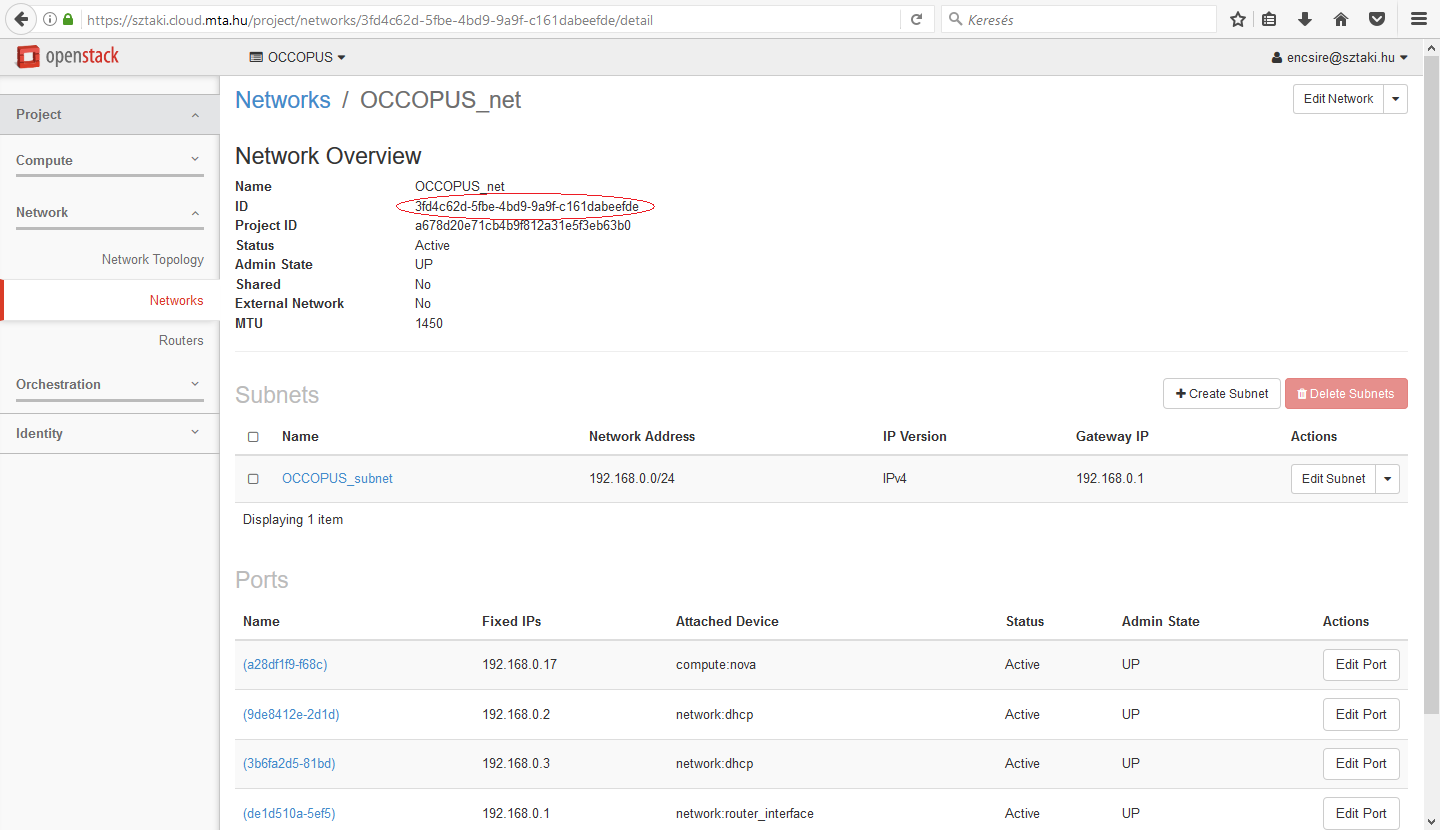
As a result, the network_id attribute in the resource section will be 3fd4c62d-5fbe-4bd9-9a9f-c161dabeefde.
flavor_name
The value of this attribute is the ID referring to the type of flavor to be instantiated through nova when realizing a virtual machine. It determines the resources (CPU, memory, storage, networking) of the node. Unfortunately flavor IDs cannot be listed on the webpage, but they can be seen on an instance’s overview page (Choose the Project/Compute/Instances menu and select one of your instances).
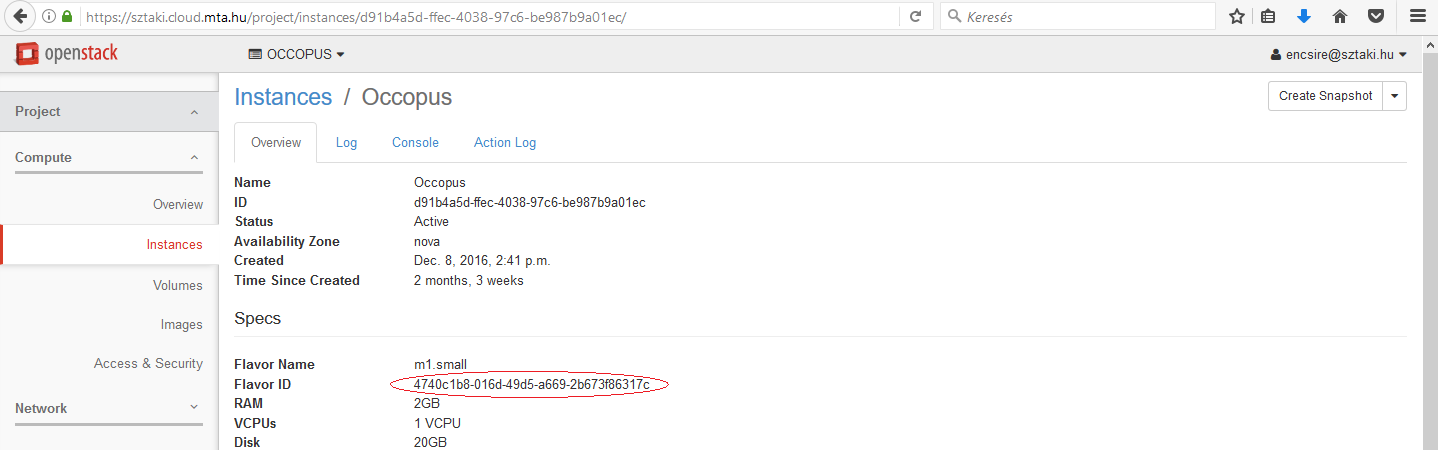
Note
For MTA Cloud users the following flavor IDs are defined: m1.small („4740c1b8-016d-49d5-a669-2b673f86317c”), m1.medium („3”), m1.large („4”), m1.xlarge („41316ba3-2d8b-4099-96d5-efa82181bb22”)
key_name
The value of this attribute is a name refering to a particular public key registered under your account. To register a new ssh keypair, generate or upload one on page under the Project/Compute/Access&Security/Key Pairs menu.
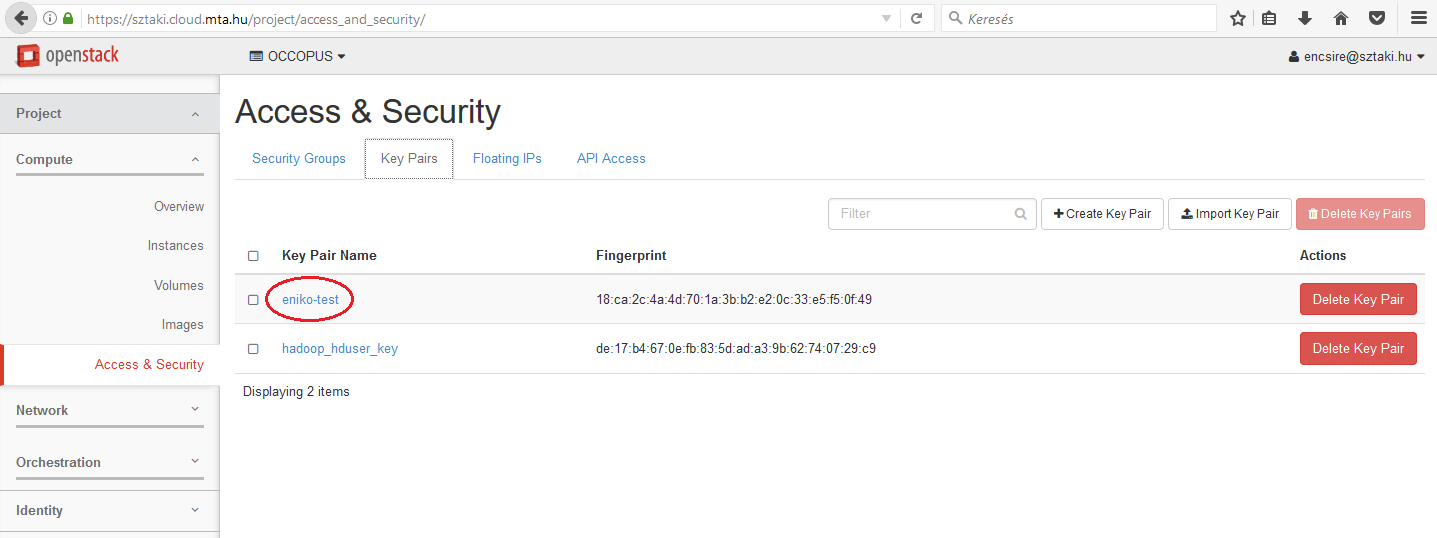
On this page you can see the list of registered keys and their fingerprint. Copy the name of your key from the Key Pair Name column.
As a result, the key_name attribute in the resource section will be eniko-test.
security_groups
The value of this attribute is a list of security groups referring to particular firewall policies registered under your project. To register a new firewall policy, use the page under the Project/Compute/Access & Security menu. On this page you can see the list of registered firewall policies.
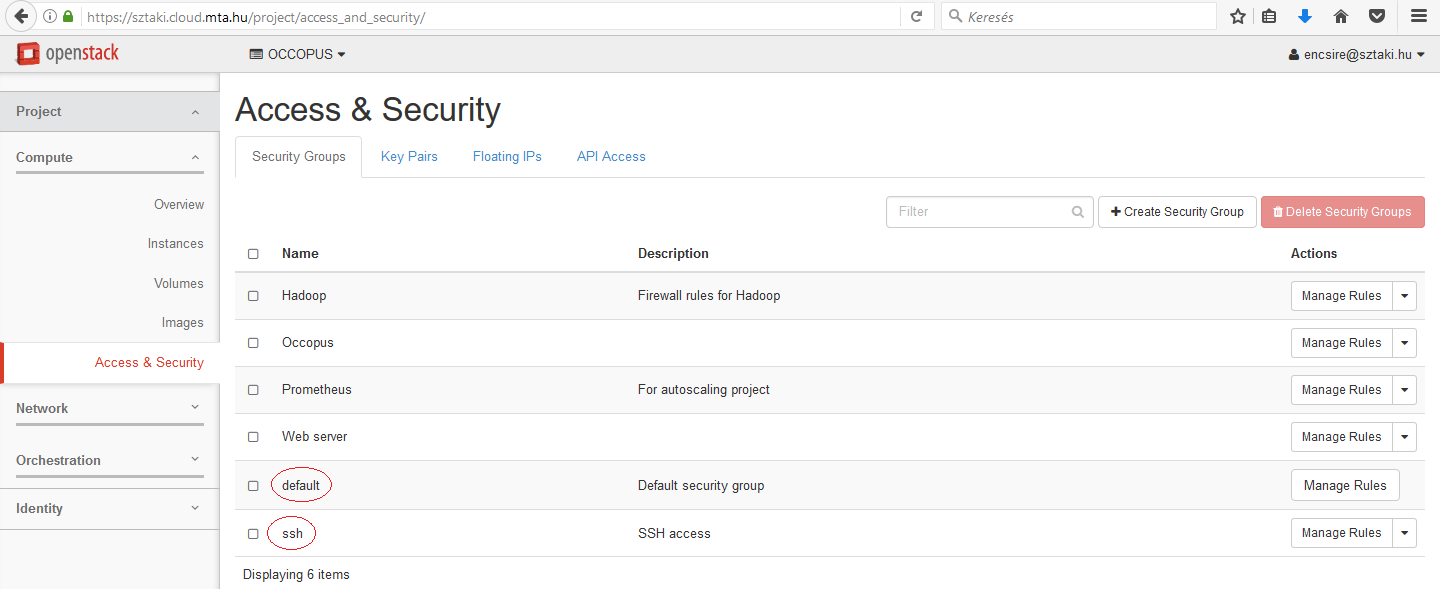
As a result, the security_groups attribute in the resource section will be default and ssh. In ssh policy, port 22 is open.
The finalised resource section with the IDs collected in the example above will look like this:
resource:
  type: nova
  endpoint: https://sztaki.cloud.mta.hu:5000/v3
  project_id: a678d20e71cb4b9f812a31e5f3eb63b0
  user_domain_name: Default
  image_id: d4f4e496-031a-4f49-b034-f8dafe28e01c
  network_id: 3fd4c62d-5fbe-4bd9-9a9f-c161dabeefde
  flavor_name: 3
  key_name: eniko-test
  security_groups: [ default, ssh]
  floating_ip: yes
  floating_ip_pool: ext-net
contextualisation:
  ...
Important
Collect the IDs under your account instead of using the ones in this example!
Important
The resource section must follow YAML syntax! Make sure indentation is proper, avoid using <tab>, use spaces!